Surfski Safety Gear
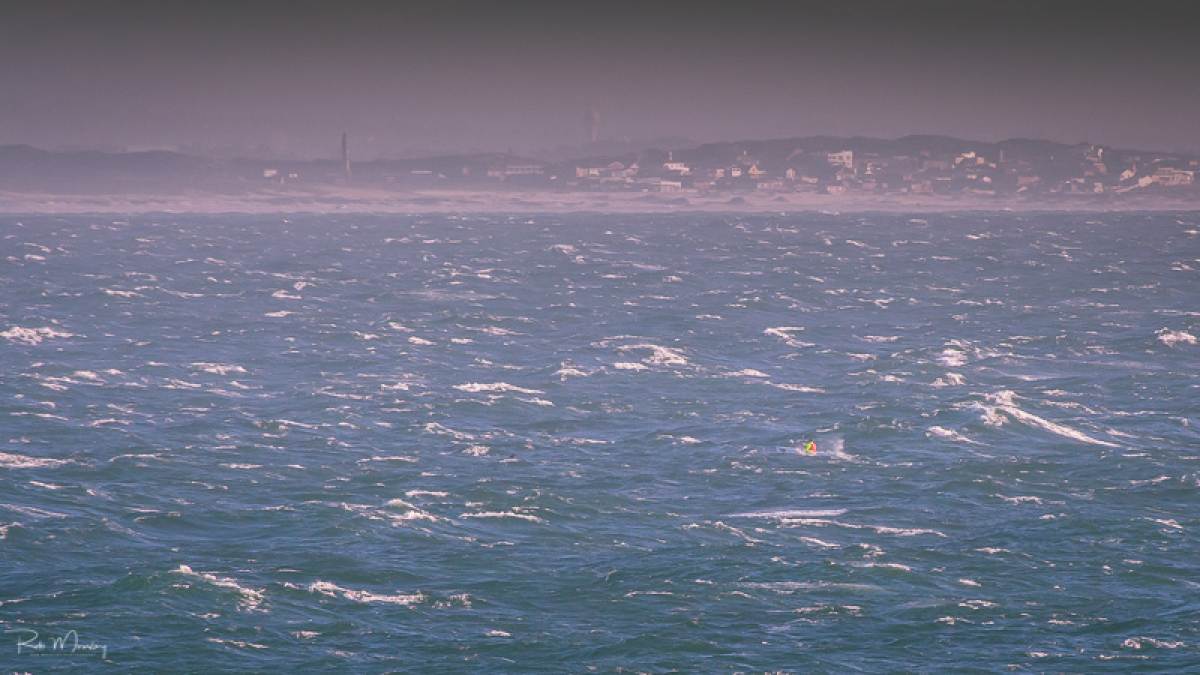 Miller's Run in extreme conditions
Extreme sports and 100% safety are incompatible. When you go to sea in gale-force downwind conditions, sometimes shit will happen. And it’s then that your safety gear and your preparedness in using it become vital…
Background
I was recently asked to give a talk on safety gear and procedures at the Fish Hoek Beach Sailing Club to a group of downwind enthusiasts. This article is based on the notes from that talk.
I paddle in Cape Town, South Africa and spend probably 70% of my time in False Bay where the water temperature is usually around 15-18C. I frequently paddle 2-3km offshore in 20-30kt winds with correspondingly rough seas. For the last year I’ve been paddling the Fenn Swordfish S, a ski that for me has a good combination of stability and downwind performance.
In the last nine years I’ve done somewhere between 500-700 downwind runs in Cape Town and am happy to claim to be an “experienced and competent” paddler – in these conditions.
I’ve been involved in Sea Rescue exercises with the National Sea Rescue Institute, been involved with two rescues myself (one of them described here) and have written up many more over the last 15 years.
While a reasonably strong swimmer, I have no illusions about my ability to swim long-distance in cold water in breaking waves, so although I’m prepared to self-rescue, if my craft suffers some catastrophic failure, I’d have no hesitation in calling for help.
Here are some recommendations based both on my own experiences and those of other surfski paddlers, mostly, but not only in South Africa.
PFD
The foundation of my safety gear is the PFD. They’re mandatory at most races around the world, and in my opinion it’s a no brainer: wear a PFD at all times!
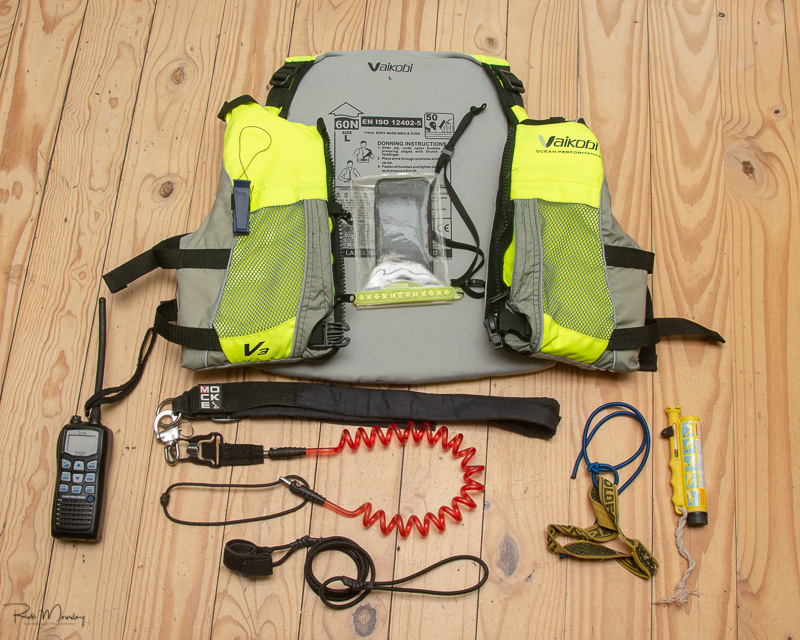
My gear setup for a big day - (clockwise) PFD with whistle, Mobile in Pouch, Pencil Flares, Emergency steering kit, Belt leash, paddle leash, VHF
I keep almost all of my safety gear on my person in the pockets of my PFD. If you lose your ski at sea, you really don’t want to lose your radio or PLB or flares with it.
I’ve been using the Vaikobi PFD for the last six months and used the Mocke PFD for years before that. I like the massive front pocket of the Mocke PFD, but I’ve got used to the two smaller side pockets on the Vaikobi and like the fact that they come equipped with zips.
To me the Vaikobi PFD feels a little lighter, but they’re both pretty comfortable.
They have identical buoyancy (60N) and both have a pocket on the back of the PFD for a camelback-style juice bladder.
Of course, there are plenty of other PFDs available around the world. Try to make sure that the one you use is certified – both Mocke and Vaikobi PFDs are certified to the ISO 12402-5 rating.
Ankle/Belt Leash
I used to use an ankle leash until one day in 2012 when I found myself standing on a reef in Mauritius having narrowly avoided being the first person to break an Epic V12… A wave swept in and pulled the boat away from me; I lost my footing and the leash wrenched my leg, twisting my knee.
Ever since, I’ve preferred a belt leash.
My current rig is a Mocke leash, modified by adding a quick-release snap shackle to the belt end. In the past five years, I’ve come off the ski out at sea and in the surf many times and a) haven’t broken the leash and b) haven’t had it unfasten itself.
There are myriad stories online of leashes that have broken or that have undone themselves and I’m not claiming that my setup is 100% foolproof - but it has worked for me for the last several years.
NB: never cross the surf-line wearing your leash. At best, if you come off, you’ll stretch it or break it; at worst you could injure yourself.
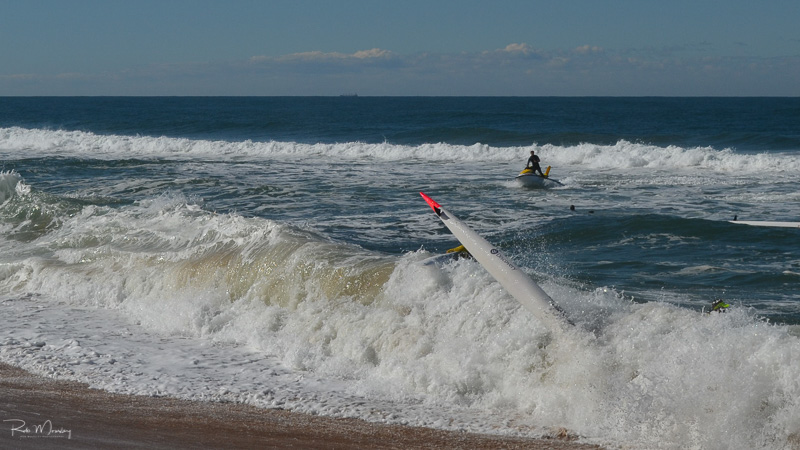
A good moment not to be leashed to the surfski
Paddle Leash
I leash my paddle to my foot-strap with a 3mm bungee cord. The primary motivation for using a paddle leash is that I can let the paddle go if I need to use both hands to do something else – I’ve often had to assist another paddler, for example, with everything from adjusting a footplate to straightening a rudder.
In an emergency the paddle leash might be of some help in preventing losing your ski – but that’s a secondary consideration.
Tangled Leashes
What about tangling the leashes? I’ve come off plenty of times, sometimes rolling the ski in the process. I have never got the leashes so badly tangled that they haven’t simply pulled apart. The key is to take your time and not panic!
Whistle
Such a small item, but it could save your life.
I used a whistle to attract the attention of an escort boat when I injured myself in a race – I tore ligaments in my back and couldn’t paddle at all. The escort boat was several hundred metres downwind, but they heard the whistle clearly above the noise of their engine and the wind and saw me waving my paddle.
I know too of another occasion when a whistle was used successfully to attract the attention of a rescue boat at night in near gale-force conditions.
It costs about 2c and should be on every PFD!
Flares
I carry a small pack of three pencil flares in my PFD pocket. Some folks carry a smoke flare either in a pocket or on their ski.
Pencil flares
- Come in packs of three or six. Best use is to pop off multiple flares, leaving an interval of 20min, say, between them and saving the last one for when you can see your rescuers. Almost always, you’ll see them before they see you.
- They only last for a few seconds but leave a smoke trail in the sky. Shoot them straight up, don’t shoot into the wind because if you do, you’ll experience “getting your own back” and a face full of burning magnesium isn’t a Good Thing.
Handheld smoke flares
- Produce a very bright light for up to 60 seconds as well as a huge cloud of red smoke.
- Give you one chance – most paddlers only carry one!
- Are usually longer (and therefore less convenient to carry) than a pencil flare kit.
The flares I use are these ones:
Some folks here in South Africa use this smoke flare:
PainsWessex has distributors all over the world.
Emergency Steering Kit
- I carry a length of bungee with a stainless-steel hook on one end and a loop of tie-down strap on the other. If I break a rudder cable, this set-up allows me to create a jury-rig where I can steer with one pedal. It should be noted that in order to install it, I have to undo my leash to swim to the back of the boat – unless I have a buddy nearby who can raft up to my boat and install it for me. Click here to see my latest emergency steering kit.
- Some paddlers carry a piece of rolled up duct tape that can be jammed under the rudder. If you don’t have steering, a jammed rudder makes the ski more manageable.
Radio
I currently carry a conventional ICOM M36 floating waterproof handheld marine VHF radio in my PFD pocket.
- The maritime authorities in South Africa have a network of VHF aerials and repeater stations all around the coast. In Cape Town this provides excellent coverage of the areas where I paddle.
- VHF communications are line-of-sight, which means range is limited if you’re a long way out to sea.
- The radio is exceptionally easy to use, even when your hands are cold.
- Radios should be tested frequently. Here in Cape Town, I can call Cape Town Radio to request a radio check – and I do it at least weekly. (After having finally obtained my radio license, after having carried my radio for years, I proudly called Cape Town Radio to request a radio check only to discover that my radio was faulty – and had been for who knows how long.)
Standard Horizon HX40
Update: a reader (thanks Thorsten!) pointed out a new radio from Standard Horizon, ideal for paddlers because of its tiny size: The HX40.
A fully fledged marine VHF radio (albeit not DSC-enabled), the HX40 is about the size of a deck of playing cards - ideal for a PFD pocket.
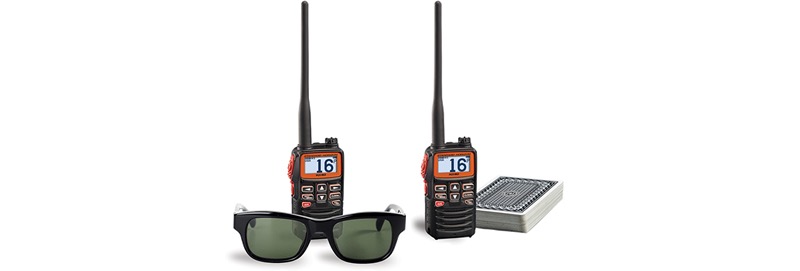
Standard Horizon HX40
DSC-enabled VHF
Newer VHF radios like the STANDARD HORIZON HX870E are equipped with GPS receivers and “Digital Selective Calling” (DCS) and have the ability to broadcast a digital emergency signal that includes your GPS position. Many commercial and almost all search and rescue vessels have DSC-enabled receivers.
Such radios can also be used for general VHF calling, as well as private communications.
Note that in order to configure a DSC-enabled radio, you have to have a unique Maritime Mobile Service Identity (MMSI) number, which works like a phone number and is issued by the maritime authority in your country.
Costs
Besides the cost of the radio, most countries require that both you and the radio be licensed. In South Africa, you’re required to take the Short Range Certificate (SRC) course. The radio license costs around R400 for the application and R140 per year.
The Short Range Certificate
This course is definitely worth doing. Even the humble M36 radio is a sophisticated piece of the kit and the H870E is still more technical. The course teaches you how to set up the radio and, more importantly, how to call for help and how to communicate in general.
The format of the Mayday and other calls is standard and can be used anywhere in the world. If you do have to call for help, you need to use the correct terminology.
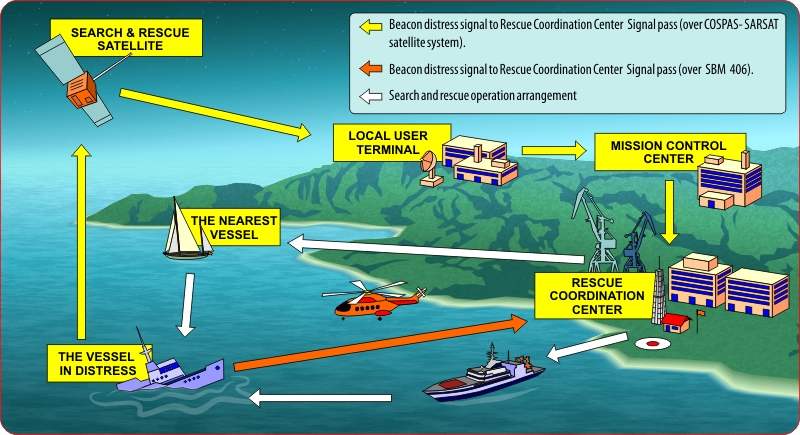
PLB
Personal Location Beacons (PLBs) are radios that communicate via a network of satellites. They incorporate GPS units, and can track and broadcast your GPS position.
To activate a PLB, you generally have to extend a short aerial and then press and hold an emergency activation button. The unit then sends a signal via the satellite network that includes your unique ID and your GPS position. The network’s ground station receives the signal and passes it on to the Maritime Rescue and Coordination Centre (MRCC) nearest your position. They then contact the appropriate search and rescue organization (like the NSRI or RNLI or coastguard) who comes to look for you.
The PLB has several advantages over other communication devices:
- The same device works all over the planet and is not limited to mobile networks or terrestrial antennae
- There’s no cost aside from the device itself.
Disadvantages include:
- The signal has to go through multiple organizations before reaching the people who are actually going to rescue you. This could take seconds, minutes or hours depending on the efficiency of the MRCC in your area.
- The communication is one-way. You have no way of speaking to the rescuers, neither do they have any means of informing you when they’re going to arrive.
The PLB is also a sophisticated piece of equipment. If you do invest in one:
- Make sure you know how to use it. RTFM!
- Understand that it must be out of the water when you use it, so a good place to carry it is mounted on the shoulder strap of your PFD.
- It needs to be tested. Every PLB has a test procedure; make sure you use it at least every six months.
Like everything else, the PLB is NOT a silver bullet:
- Click here to read a story where the PLB was a complete failure
- Click here to read a story where the PLB was a complete success
SPOT
The SPOT Gen3 device offers a kind of hybrid service; it communicates via a commercial satellite system and can be configured to send messages not only to emergency services, but to a configurable list of recipients (like your family members). It can also be used as a tracker device while you’re on the move.
While the unit itself is less expensive than most PLBs, there is a hefty annual service subscription ($199 per year).
Click here for more information on the SPOT Gen 3 system.
SafeTrx App running on a SmartPhone
For a couple of years now I’ve carried my iPhone with the SafeTrx app installed and running. SafeTrx is available in the following countries:
- Australia (Coast Guard SafeTrx)
- Cyprus (CyJRCC SfTrx)
- Finland (Trossi Service (FLBI))
- Germany (Safetrx der Seenotretter)
- Ireland (Irish Sailing SafeTrx)
- Netherlands (KNRM Helpt)
- Norway (RS SafeTrx)
- South Africa (SafeTrx RSA)
- Spain (Salvamento Martimo SafeTrx)
- UK (RYA SafeTrx)
SafeTrx has the following features:
- It sends your GPS position every 10min (or 5min or 1min, you can configure it) to a website monitored by the local search and rescue authority.
- You can press an emergency button that immediate alerts the SAR authority, who generally will try to call you to confirm the emergency before sending rescuers.
- You can send a link via WhatsApp, Messenger, email, etc. to people who would like to track you. The recipient clicks on the link and the SafeTrx web page opens showing your current position. When we do a downwind paddle, I generally send the link to at least one of the other paddlers in the group as well as my wife who likes to know where I am – especially when we’re out in gale-force winds! (An advantage is that I don’t have to remember to call her afterwards to tell her that we’ve finished.)
SafeTrx Advantages:
- It’s free to use.
- Most paddlers have an iPhone or Android device capable of running SafeTrx (and pouches, like the Gooper, are very reliable these days).
Disadvantages
- SafeTrx requires a good connection to the mobile network. In some isolated places, this may not be present.
- It’s not always easy to operate a touch-screen through a plastic pouch – with wet fingers. (I don’t rely on being able to call for help with SafeTrx, although I’d certainly try; what I do want is for the NSRI to be able to look online and see my position to facilitate their search.)
Shit Happens
What are the most common emergencies in surfski paddling?
Can’t Remount
A common (and the most easily prevented) cause of surfski emergencies is the inability to remount.
- Practice. If you haven’t mastered the art of the sidesaddle remount, then watch the video below and go practice it. Then practice it some more.
- Practice. Oscar Chalupsky has a great drill: sit side-saddle on the ski with both legs over one side, bracing on the same side as your legs. Take a paddle stroke and lift both legs onto the other side of the ski so that you’re sitting with both legs on the other side, bracing on that side. Do this ten times… The more you do it, the more comfortable and confident you’ll be.
- Practice. You need to be just as comfortable remounting from either side of your ski. Most paddlers feel more comfortable remounting from the left side of the ski – practice remounting from the right side too.
- Practice. Make sure you practice in rough conditions, not just on flat water. Don’t be afraid of remounting in strong winds – when the wind is blowing, it’s actually easier to remount as the wind pushes you onto the ski and stabilizes you. Go try it on a windy day (an onshore wind is a Good Idea!)
- Practice. Bring the remount into your regular sessions – at the end of a downwind run, do a remount from each side of the boat. If you’re doing intervals, include a remount between each one.
There’s really no excuse for this one. If you’re not super-confident about your remount, then you shouldn’t be offshore.
Broken Rudder Cable
Rudder cables break, there’s no getting away from it. You should replace your cables regularly ever year to reduce the chances of a breakage, but it still happens.
In fact, my own last cable-breaking incident occurred a few days after I had replaced some three-year old cables; the new ones were installed badly and one of the brand-new cables broke at the tiller bar.
If a cable breaks at sea, you’ll find the ski barely controllable as it will want to turn continuously to one side (duh). There are a couple of things you can do to help the situation:
- Jam the rudder straight; some paddlers carry a piece of rolled up duct tape in the pocket of their PFD for this purpose. A straight rudder is better than one flopping to one side. I had occasion to practice this recently when I hit a submerged buoy on a downwind run; the rudder was bent and jammed solid against the hull. Fortunately it was jammed fairly straight so it acted like skeg. I found that I was able to paddle to get some speed up (even surfing on the waves) and then steer by bracing with the paddle far back, close to the ski, in a similar manner to sea kayakers. It helped that I was on the Swordfish S, a boat I find very stable. It would have been much more difficult on a less stable surfski.
- Use a bungee, hooked onto the tiller bar on the side where the cable is intact. This gives you full steering with only one pedal. Here’s my current emergency steering setup.
- Raft up with one or two buddies. One of our group broke a cable when none of us had materials to jam his rudder. Two skis rafted up to the casualty boat, one on each side. The middle paddler held onto the two outside boats while the outside paddlers propelled and steered the raft forward.
Broken Footplate
On a raging downwind, I broke my footplate right off the boat and ended up with no steering at all and nothing to push my feet against.
My buddy rafted with me and we tied knots in the rudder ropes on the other side of the rudder pedals so that while I had no footplate to push against, I could still use the pedals to steer.
The lesson in this case was to think outside the box and to make a plan. Never give up!
Broken Surfski
In 2012, a paddler on a wild Miller’s Run was smashed by a huge breaking wave, which popped the seams on his ski. Within moments it disintegrated, leaving him leashed to the rear half of the wreckage.
He had his mobile phone and managed contact the NSRI, and they launched but struggled to find him in the maelstrom of breaking waves… Part of the problem was that the estimated position that he gave the NSRI was out by a kilometer or so.
He was finally spotted by an observer on shore equipped with a telescope who was able to direct the NSRI onto him.
What saved him on that occasion was his mobile phone – if SafeTrx had been available back then, the NSRI would have been able to find him much more quickly.
He might have been able to get his GPS coordinates off his Garmin – make sure that you know how to do that. (Main Menu, GPS, Save Location on my Garmin Forerunner.)
Aside from his mobile, the fact that he stayed with what was left of his boat also helped the observer on shore spot him.
Broken Paddler
In the last six months alone, I know of two surfski paddlers who injured their shoulders while paddling – to the extent that they couldn’t use the injured limbs.
In such circumstances, it doesn’t matter if you’re the world’s best swimmer – you can’t swim if you can’t move your arm. Your PFD is your friend.
What happened?
- In Cape Town, Paul Grey was taking part in a downwind race in big conditions a few months ago. He was surfing down a wave, bracing, when the paddle hooked on a wave – and jarred his arm, partially dislocating his shoulder. In extreme pain, he stopped, legs out and tried to take his mobile out to call for help. Finding that he couldn’t do it with one arm, he decided to paddle on and managed to make his way, paddling on one side only, to shore.
- In France, the junior surfski champion, Killian Marzin caught a few waves at a surf spot while paddling on otherwise flat water. As he broached off a wave, it collapsed on his outstretched arm, dislocating his shoulder. Click here for the full story.
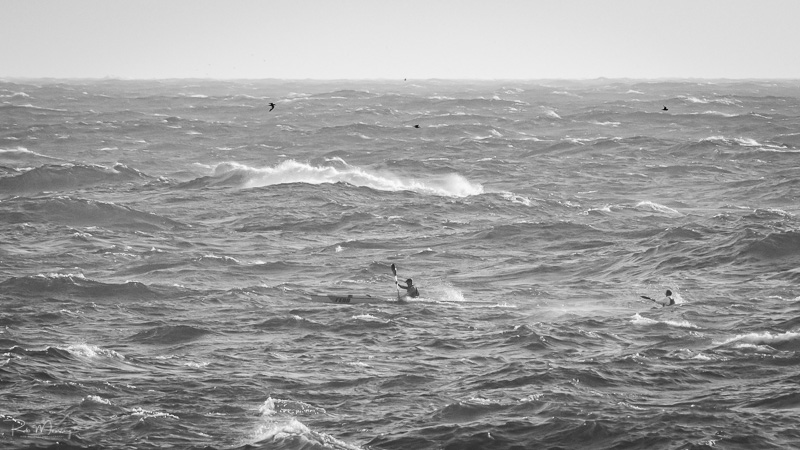
Conditions where you need to have your A-game... and your safety gear and procedures on the top line. (Miller's Run on a "proper" day!)
What will kill you?
In most places around the world, the thing that will actually kill you is hypothermia. I have enormous respect for the folks in the northern hemisphere who wear wetsuits and pogies and other hectic cold-water gear to paddle.
In South Africa the average minimum temperature in winter on the Atlantic side of the Cape Peninsula is less than 14C; in summer the maximum can be as high as 21C. A complicating factor is that the air temperature is often a lot higher than the sea temperature – which makes it difficult to dress for the sea temperature. Sometimes you’d suffer heatstroke if you wore clothing suitable for immersion.
On the Indian Ocean side of the peninsula, where I mostly paddle, the water tends to be several degrees warmer.
So, you need to find clothing that will keep you alive in the water but won’t kill you when you’re not!
When Casper Kruger was rescued after 6 hours in 17C water, a factor in his survival was that he kept as much of his body as he could out of the water by draping himself across his ski.
On a hot day, I wear:
- Vibram 5-fingers shoes, which have a hard rubber sole that protects my feet. They don’t have any warming properties, they’re not neoprene booties.
- Shorts or a thin fabric long pants (if there’s a chance of bluebottles in the water)
- A wicking top
- A high-viz cap
On a cold day, I wear:
- My Vibram Five Fingers shoes.
- Vaikobi VCOLD FLEX Paddle Pants
- Two wicking tops
- Wind Cheater
- High viz cap
While this is pretty much standard paddling gear for most of South Africa (in the tropical waters of Durban, they wear less!), I’m looking forward to testing the SUPSKIN paddle suit – a dry suit made by SUPSKIN in Portugal and designed specifically for paddling.
No Silver Bullet
It’s vital to understand that no single system is 100% guaranteed to get you out of trouble: safety requires a holistic approach starting with fitness and competence, moving on to appropriate clothing, equipment, maintenance and familiarity with each system.
Links to Gear
PLBs in the USA
- Ocean Signal rescueME PLB1 - Programmed for USA Registration
- McMurdo Fast Find 220 PLB – Programmed for US Registration
PLBs in the UK
- Ocean Signal rescueME PLB1 - Programmed for UK Registration
- McMurdo FastFind 220 PLB – Programmed for UK Registration
PLBs for the rest of the world
- Ocean Signal rescueME PLB1 - Programmed for Rest of World
- McMurdo FastFind 220 PLB - Programmed for Rest of World
Handheld VHF Radios – Amazon.com
- Standard Horizon HX870 Floating 6W Handheld VHF with Internal GPS
- ICOM M36 Floating Handheld VHF Radio
- Standard Horizon HX40 Compact Handheld VHF Radio