More Downwind Video
Hurricane Alley was living up to its name - the 30kt NNW wind was ricocheting off the cliffs and mini-tornados were swirling clouds of spray across the surface of sea... and I knew that the cameras were out of memory!

Reverse Buffels
Cape Town is a fabulous place for paddling: in summer the gale-force southeasters blow us from Millers Point to Fish Hoek (or from Milnerton to Melkbos!); in winter the gale-force northwesters blow us from Fish Hoek to Millers Point!
But sometimes the wind veers to the north-north-west and we get the best of winter downwind routes - from Fish Hoek past Millers Point all the way down to Buffels Bay in the Cape Point Nature Reserve.
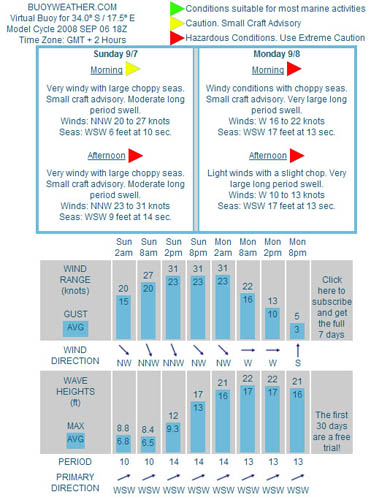
Sunday's forecast was for 23-31kt NNW in the afternoon - so we agreed to meet at Fish Hoek at 1pm to do the 22km run down to Buffels.

Fantastic Conditions
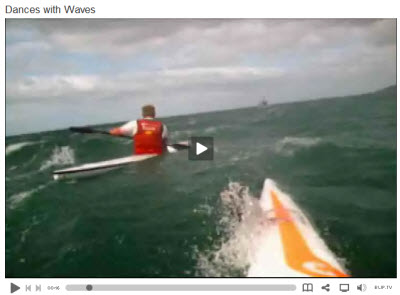
As you can see in the video, the conditions were ideal - we were riding fun swells half way to the lighthouse - and from there on they just got bigger and bigger.
Some of the runs seemed to go on forever - you'd sit on the crest for a few moments, then slide down the face, paddle a few strokes, up and over and onto the next crest, scan for the next dip, a couple of strokes and into, and on and on.
Hurricane Alley
Some 5km from Buffels Bay, our route took us past some sheer cliffs just past Smitswinkel Bay. This area is notorious for the gusts of wind that swirl across the sea, lifting sheets of spray off the water. If the northwester has any westerly component in it, the gusts can turn savage, blowing directly (and dangerously) offshore.
Although it looked impressive on Sunday, the wind was blowing in a southerly direction and we simply had to stop paddling whenever the squalls hit - brace, stay in the boat and let it go over.
Unfortunately, by the time we got there, both my cameras were out of memory so I wasn't able to capture Hurricane Alley on video.
The Cameras
We have two of the GoPro Hero3 cameras now. They capture up to about 57 minutes of video, storing it on 2GByte SD cards.
I bought them from Amazon. I also bought the GoPro car mounting kit which comes with a sucker mounting - which you can see on the foredeck in the video.
We've had our helmet cam mounting for quite a while now and although ours is homemade, you can buy a helmet mount kit from GoPro as well.
Using the cameras
I've been trying the mountings in various positions on skis with varying levels of success. Some of the things I've learnt are:
-
Use high capacity rechargeable batteries (ordinary batteries tend to last only about 30 minutes.
-
Splash the helmet cam often to clear the lens - on this run the last 30 minutes of footage was useless because of a spot of salt that obscured half the lens. The waves that I didn't film were much bigger than the ones on the clip!
-
Video is much more interesting with other skis in the frame.
-
The microphone on the helmet cam works surprising well - capturing wind sounds as well as spoken commentary (although viewers might argue whether that's a good thing!)
There's a new version of the camera due out shortly that has a wide angle lens which will not only (obviously) increase the field of vision, but will have the effect of image stabilization - I can't wait.
Rambo - Paddling Video Expert
Check out Rambo's blogspot - http://rambos-locker.blogspot.com/
Rambo is a crazy Australian outrigger canoe paddler who has been working with these and other cameras for a lot longer than me. He's become such an expert that GoPro send him their prototypes to test - I believe he's testing the wide angle Hero as I write this.
Rambo's launching a ‘how-to' blog aimed at helping folks get the best out of their GoPro cameras - check it out.

